
When you click the 'My Projects' tab you are taken to the 'My Projects' page where you can manage your projects. Projects are private so you first need to log-in, do not forget your log-in details because currently if you loose them they cannot be recovered!. If you make your username match your email, we might add that feature eventually.
Use a descriptive name for your project split with spaces such as 'ford escort car' so that if you decide to publish your project it will be easy to search for. Each project name must be unique to Free3D so you might need to add extra digits or details on the end such as a number. Once you have done this click on the new icon that appears to visit its project page.
A new tab appears, named the same as your project. - This project-tab that allows you to upload images.
The project-tab (like many others) contains a help button providing detailed information on how to use it.

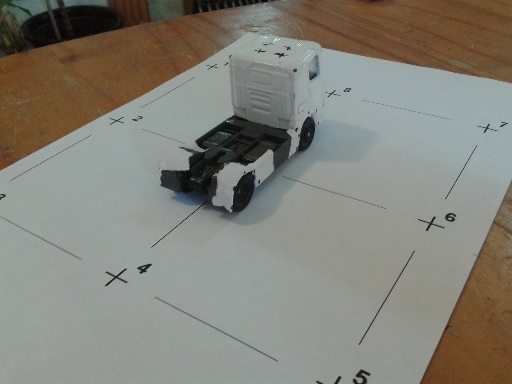
Use the project-tab to upload images of the item you want to create a 3D model of, taken from several different angles. You might want to mark your item with spots or crosses where you require a point on your 3D model.
These images need to contain at least part of the flat reference object. The reference object consists of four equally sized squares clustered together, the eight outer vertexes should be numbered counter-clockwise - You can print one out using these links [PNG JPG PDF]. When taking these pictures do not move the item or reference object - also use the same camera, image scaling and orientation.
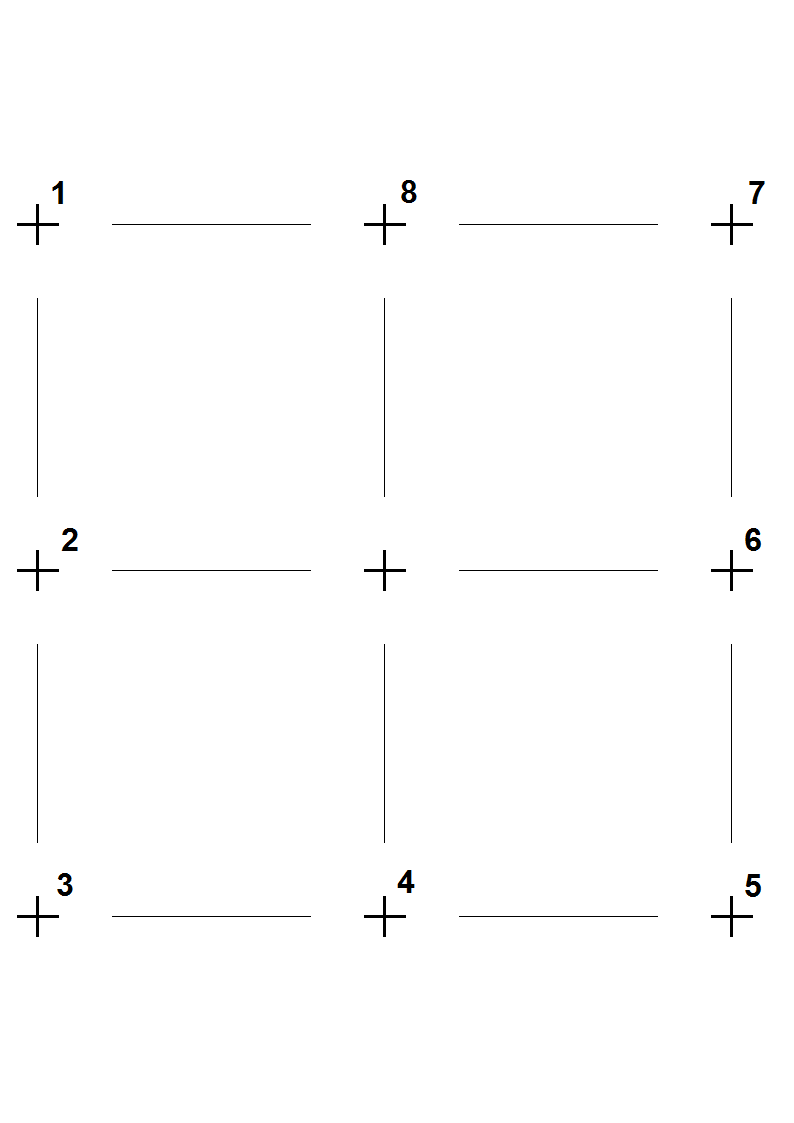
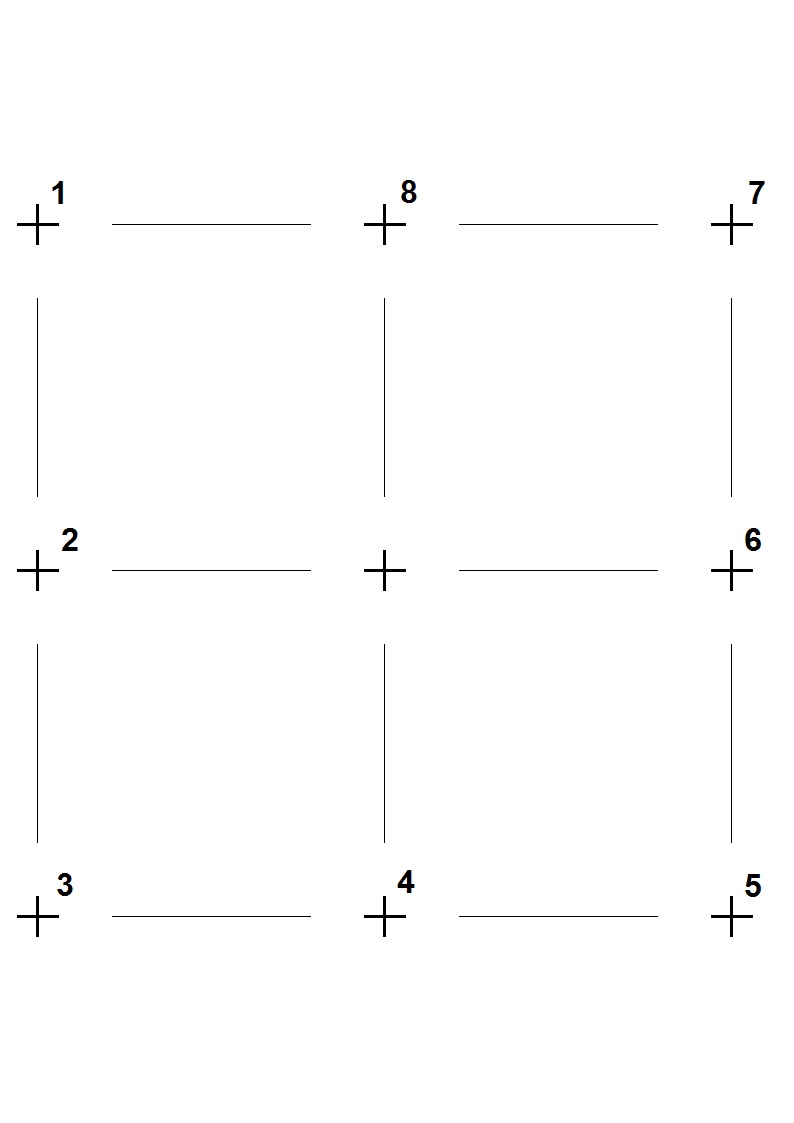
Next click the 'Edit' tab which takes you to a 2D-edit-view. The 2D-edit-view starts on the first image and expects to be given the first point of the reference object. If it happens to be visible in the image click on it and you will see a square cursor appear indicating you have now registered the position of that point on that image.
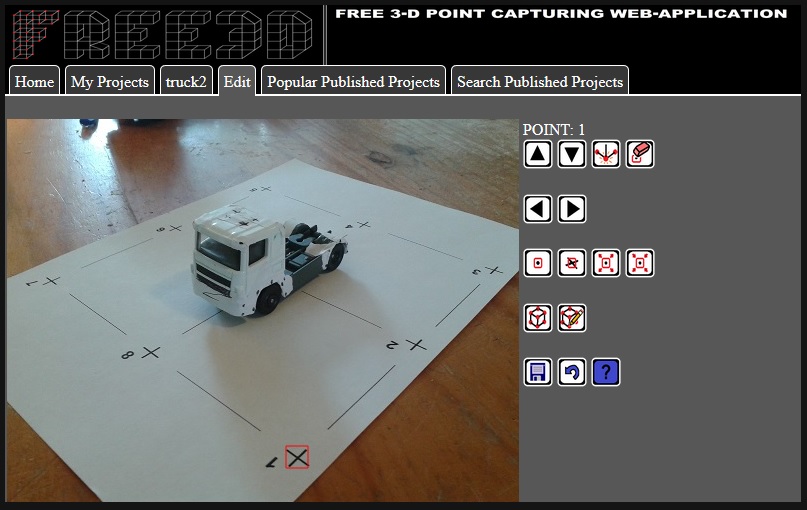
Use the image-traverse keys to move to other images 
Use the point-traverse keys to move to other points 
You do not need all eight reference object points to be present in every image, just sufficient to determine the cameras viewpoint (or that image gets ignored).
After completing registering the eight points of the reference object in the various images, add more points of your own using 
A progress snapshot is saved to the server whenever you swap tabs, but you can (and should) also do this manually occasionally using 
An undo key is also provided, should you wish to correct your actions 
Once you have registered all the points you need, click the compute 3D points button and bingo your 3D points will be generated 
Then you can see what your 3D model looks like by clicking the 3D-edit-view button 
Sliders control the viewpoint, magnification and far-plane (cutoff-plane) of the view without altering your 3D model.
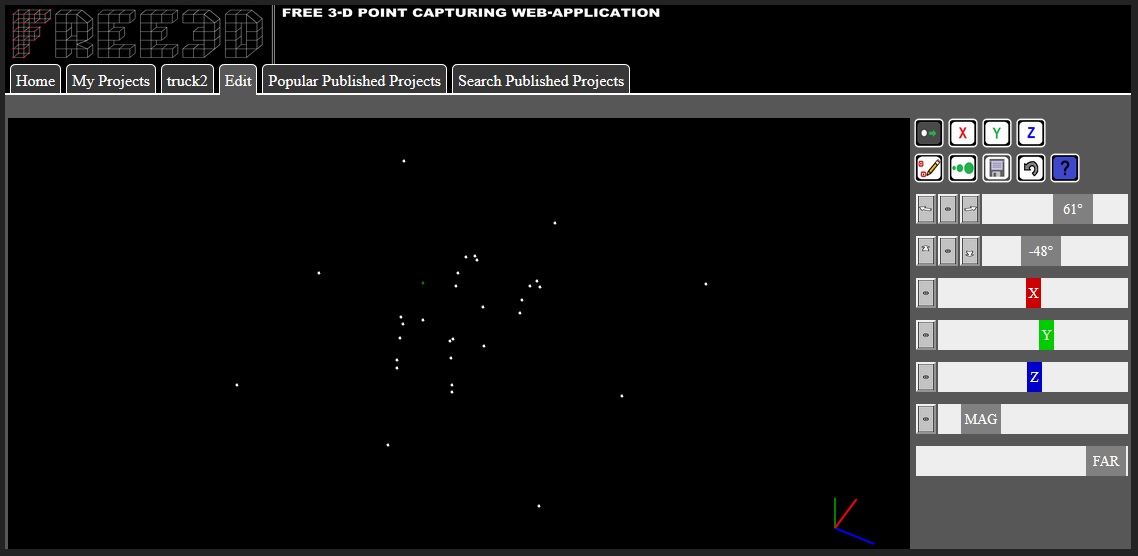
The 3D-edit-view initially starts in pick-mode 
In pick-mode you can select a 3D point (the selected point then turns green) then copy any of its three coordinates onto the XYZ-clip-board using 
If you press the pick-mode button, it toggles into push-mode 
In push-mode when you select a 3D point, any coordinates held on the XYZ-clip-board get pushed into that 3D point (which then turns red so you can tell where its gone). Do not forget to keep using the save and undo buttons as you go.
If you need to return back to the 2D-edit-view for any reason (say to add another point or adjust a point) simply click 
Once your happy with all your 3D points return back to the project page (The tab you used to upload the projects images). At the bottom of the tab you will find [CSV] and [COLLADA] buttons which allow you to download the 3D models coordinates. If you fancy sharing your 3D model with the rest of the world then click [publish project] which allows others to view and download the your projects 3D points, but not edit them.